
TIPS AND TRICKS
As a chef I feel as though I have a good base of kitchen and food knowledge. But believe me there’s always something new to learn, no matter how much experience you have! I learn something new on a regular basis and now it’s my turn to share that information with you. Check back regularly for my newest kitchen hack, helpful tip, DIY technique and MORE.

Dull Knife Dangers
A chef’s most important tool in the kitchen is their knife (or knives, plural!). It’s an extension of our hand, a means to an end result and a very personal piece of equipment in that a knife that works for one chef may not work for another. But the one thing we all agree on is that a dull knife is WAY more dangerous than a sharp knife. So why is it so important to keep those knives razor sharp?
Safety – It’s all about the pressure you need to exert when cutting an ingredient. With a dull knife you need to apply additional pressure and the knife may resist and slip. And yes, even a dull knife can harm human flesh. Sharp knives glide through ingredients and allow you to use proper knife skills. And with proper knife skills you can avoid things like carpal tunnel, tendonitis and so forth.
Knife Damage – As mentioned above, with a dull knife you need to exert extra pressure to cut an ingredient. In doing this you are surrendering your ability to control the blade. Hence at the end of the cut, it’s likely that your blade will make strong contact with the cutting board surface and damage the edge of your knife. (Pro-Tip: NEVER use glass or plastic cutting boards!)
Ingredient Damage – Let’s just be blunt (pun intended!), a dull knife can affect the outcome of the dish you are preparing. Squishing, bruising, crushing and mangling of ingredients happens when your knife is not sharp enough to push through. No one wants mushy tomatoes, bruised herbs or misshaped veggies in their meal!
Time Savings – With a sharp knife you are able to cut swiftly and efficiently. Hence faster processing of ingredients which leads to a quicker to-the-table dinner!
Bottom line – GET YOUR KNIVES SHARPENED! And the two most commonly asked questions:
How Often: The frequency will depend on your use, but in general I’d say every 3-4 months for low to average use (HA, don’t even ask me how often I get mine done!).
Where: Check for culinary retail shops in your area, local farmers markets are a popular stop for “traveling” sharpeners, do a quick Google search and if you’re local to Palatine, IL (or the surrounding suburbs) check out Cook Cork and Fork (https://cookcorkandfork.com/index.html) – Give John a call, he’s the best and the only one I trust with my babies!

No Whining – Cooking wine that is!
I don’t know about you, but so many of my recipes call for a pan deglaze with white or red wine – guess I’m just drawn to that technique to build flavor! However, it’s important to think about what kind of wine you’re using. In most local grocery stores they sell what they call “cooking wine”. But what is cooking wine exactly?
While it is technically wine it does tend to be higher in alcohol than most table wines and therefore is much stronger in flavor making it an undesirable sipping wine – (trust me, one taste and you’ll see - I mean you don’t find it in the wine section; it’s with the vinegar and that should tell you all you need to know!!). But the higher alcohol content also means that it will take longer to burn off during the cooking process. So if the alcohol is not completely burned off correctly, you’re left with a very alcohol-forward tasting dish.
Additionally cooking wine also contains salt, preservatives and in some cases, a sweetener. This extends the shelf life of an open bottle from hours to months but it also then impacts the final recipe by adding in different, unintentional, flavors.
So you may be wondering where I’m going with all of this – what’s my pro-tip?! Do what I do and head to the wine section of your grocery store and look for those individual box wine bottles (you know the ones I’m talking about). These little bottles are great for people who don’t purchase table wine and only use small amounts of wine in their cooking from time to time. Their flavors are closer to a good table wine, they are “sippable” and they don’t have the downside of the additives. And bonus, they work great in a pinch when you just need that one glass of wine to close out a day!
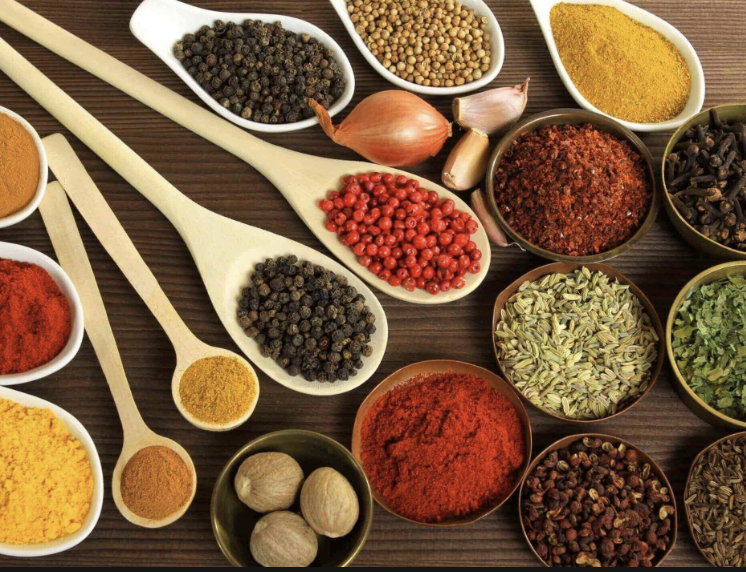
Spice Rub DIY
Lately I’ve been on the hunt to replace my recently depleted Greek seasoning spice blend. I’ve looked in every mainstream grocery store and even those big box all-purpose shopping venues but that darn Greek seasoning was proving to be pretty allusive! And then I got to thinking why not DIY it! Yes, you can make your own Greek seasoning – in fact you can make almost any spice blend yourself.
And truth be told, DIY seasoning blends are always a better idea than purchasing them pre-made at the store (somehow, I had forgotten this!). When you make your own, you are able to customize the blend to your taste (amp up that garlic powder!), make smaller batches (so they don’t go bad) and have better control of the ingredients (for things like salt, food allergies, etc.). And better, because many spice blends are nothing more than a mix of common spices, you probably already have all of the ingredients at home and will save money by making it from scratch versus buying premade!
So today I’m off to refill that shaker bottle with my own version of Greek seasoning (see recipe below) AND to write down a list of other blends to conduct recipe research for. Thinking taco, Italian, steakhouse…oooohhh, Ranch seasoning! Gotta practice what I preach!
Stacy’s Greek Seasoning Blend (makes 10 TBS)
2 teaspoons salt
2-1/2 teaspoons garlic powder
2 teaspoons dried oregano *
2 teaspoons dried basil
1 teaspoon dried onion powder
1 teaspoon ground black pepper
1 teaspoon dried parsley
1 teaspoon dried dill weed
1 teaspoon dried marjoram
½ teaspoon ground thyme
¼ teaspoon ground cinnamon
¼ teaspoon ground nutmeg
*NOTE: I used homegrown/home dried “regular” oregano but you can also use Greek oregano which has a stronger flavor profile)
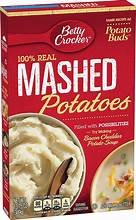
Beyond the Spud - Potato Flakes
I love it when I learn new and unique uses for kitchen pantry ingredients! Today I’m turning what might be thought of as a single use (and might I add boring, often judged and not that tasty!) ingredient into a powerful multitasking, surprising kitchen workhorse! We’re talking dehydrated instant mashed potatoes!
Recently I was watching one of my favorite TV chefs (Michael Voltaggio) whip up lamb meatballs and I was shocked to learn that he used instant potatoes in the recipe. The flakes blend into the mix easily and keep the meat tender and moist. And as an extra bonus, those meatballs are also now gluten-free! Who knew!
So it got me thinking, how else can I use instant potatoes to further solidify them as a pantry staple in my kitchen. Turns out, there are quite a few things. Here are just a few to get you started!
1) Make extra-crispy chicken, fish, or pork – Replace breadcrumbs or crackers with potato flakes for your dry dredge. This will help create a light and crispy coating that keeps the meat moist. And again gluten-free!
2) Bake soft & fluffy biscuits, rolls, and focaccia - Adding starchy instant potato flakes to homemade bread gives it a uniquely soft and fluffy texture, and whatever you make — be it dinner rolls or a sheet pan of focaccia bread — will remain fresh for several days after it’s baked. Plus, the potassium from the potatoes causes the yeast to rise faster, meaning you’ll be digging in that much sooner.
3) Whip up light-as-air gnocchi - Starting with the dehydrated cooked potato flakes means you can get away with adding less flour to your gnocchi dough — resulting in a fluffier, less gummy gnocchi. Plus, you get to skip over the steps of cooking and ricing whole potatoes.
4) Make a gluten-free pan sauce or gravy - Potato flakes make an excellent thickener—and you won’t have to worry about lumpiness or cooking out raw flavors, as you do when thickening with flour. Just scrape up the pan drippings with whatever liquid you’re using (wine, stock, etc.), bring to a boil, then add the potato flakes (for 1 cup liquid, stir in about 1 tablespoon flakes, give them a few seconds to dissolve, and adjust to your preference). For an extra-smooth sauce, grind the flakes in a spice grinder before incorporating them.

Monk Fruit – The Better Sweetener
Monk fruit is a natural sweetener that tastes like sugar but has zero calories! What? Too good to be true? May sound that way but believe it or not this is 100% accurate. And I love it! Not only is monk fruit calorie-free but it’s also carb-free and will not raise blood glucose levels. Its ultra-sweet flavor means a little bit goes a long way but in most cases monk fruit can be used as a cup-for-cup equivalent to sugar. There are many brands on the market (and generally can be found in the dry goods baking aisle) so be sure to read the packaging to ensure this is the case for your desired brand. My go to brands are Monk Fruit In The Raw or Lakanto Monk Fruit Sweetener. Monk fruit sweeteners may cost a bit more than sugar, but you and your health are well worth it! So next time you reach for the sugar bowl, don’t and instead reach for the monk fruit. Want a few suggestions on how to use it?
Add it to coffee or tea as a sweetener
Substitute it for sugar in baking
Sprinkle it on breakfast items like oatmeal or yogurt
Incorporate it into salad dressings
Sprinkle it on fruits for extra sweetness

In a Pickle
When a chef talks about “balancing a dish” they are referring to a harmony of all of the flavors present in a dish. That can be sweet, bitter, acidic, fatty, salty, etc. Balance means that not one of those flavors outshines the other, but rather they complement each other and create an even more harmonious bite.
Most people think about seasoning as it relates to salt and pepper or other spices. And while that is a necessary component, it should not be the only way of thinking about seasoning. When I create a dish one of my most important considerations is the amount of acid that is present. I just love that pop of “hello!” – to me it elevates flavors, awakens the tastebuds and makes eating exciting. So often times my go to acid bomb takes the shape of something pickled. Not the standard cucumber pickles per say but rather the use of a pickling technique. By definition pickling is the process of preserving or extending the shelf life of food by either anaerobic fermentation in brine or immersion in vinegar. But outside of preserving or extending shelf life, picking does wonderful things to both the flavor and texture of said pickled ingredients.
My two go to pickle ingredients for use in recipes are red onion and radish. Both can be quick-pickled in no time at all and used in a number of ways – to add acid, to add crunch, to add a pop of color. And what’s even better is that all of those things are so easy to achieve because pickling is so easy! That’s right, just a few ingredients, a few easy-to-follow steps and a bit of patience (at least 30 minutes to chill!). Here’s how I do it…
1# pickle ingredient of choice (red onion, radish, jalapeno, cucumber, etc.) – thinly sliced½ small onion, thinly sliced 1-1/2 cup distilled white vinegar½ cup sugar (you can adjust up/down depending on if you like a sweeter pickle)2 TBS mustard seeds1 tsp salt¼ tsp crushed red pepper (optional)1 bunch chopped FRESH herbs (optional – dill, thyme, oregano, etc.)1) Add the “pickle ingredient”, onion and (if using) fresh herbs to a 1-quart jar or other airtight container. Combine vinegar, sugar, mustard seed, salt, red pepper (if using) in a small saucepan. Cook over medium heat, stirring frequently, until mixture begins to simmer and sugar has dissolved completely – about 5 minutes.2) Pour the liquid into the jar and stir to evenly distribute all ingredients. Let sit, uncovered, until the mixture cools to room temperature, then cover and refrigerate until ready to use. So next time you’re looking to balance a dish with a pop of acid, give this technique a go. What’s that famous saying from the show Portlandia? – “We can pickle that”!!! And you can!

Dressing Up
I dare you to count the number of salad dressing bottles in your fridge right now! Chances are you have several – and an even better chance that you haven’t used at least one (if not more) of them in months! Did you know it’s as easy as 1-2-3 to make your own vinaigrette?
Simply start with 1-part acid of choice (red wine/balsamic/white wine/apple cider vinegar or lemon/lime/orange juice), 2 TBS of mustard (any kind EXCEPT yellow), and finish with 3-part oil or fat (I prefer extra virgin olive oil). Don’t forget the salt and pepper and feel free to experiment with add-ins to give it that extra “zhuzh” (chopped herbs, minced garlic, honey).
By making your own you cut down on waste, are able to make small batches so you’re not stuck eating the same “flavor” every day and what’s more, homemade = healthier.
But wait, I’ve also got a great tip to make those creamy mayo-based dressings (ranch, Caesar, blue cheese) lighter and healthier too. You know I love it - blended cottage cheese makes for a great substitute ingredient in recipes instead of mayo! Who knew? Well, now YOU do!

Springtime Blossoms
It’s CHIVE BLOSSOM season!!! Not only are they a wonderful pop of color in your garden but did you know they are also edible? Yup – sprinkle the petals on salads and other dishes for a light chive hint of flavor, top a crostini or appetizer for a dramatic visual impact, or even dry them for use throughout the year! Don’t let the season pass you by without taking advantage of this beautiful gift from nature!

No Red Onion...Unless you do THIS!
If you watch Food Network, and more specifically the TV show “Chopped”, then you probably know Scott Conant’s hatred for red onion. Me myself, LOVE red onion…but only if they are small dice or thin slice. But some people do find them to be too strong and a bit overpowering.
Well, do I have a trick to tame even the reddest of red onions – ICE WATER!!
Yup, that’s right, just a simple short little ice water bath and the strong red onion flavor melts away. Prep your onion as your recipe dictates (dice, chop, slice, etc.) then break apart the pieces and plop them into ice water. Leave them for 15 minutes, drain, pat dry and you’ll have hydrated, less assertive red onions. While I still wouldn’t recommend trying to serve them to Scott, but perhaps you’ll find a few more red onion fans!

Less Fat, More Protein - The “NEW” Super Substitute!
It’s all the rage these days but I’ve been a cottage cheese lover all my life. However, I am discovering new ways to use it in my cooking vs. pairing it with tomatoes and Triscuits for lunch! It’s a high source of protein and can be low fat – making it a nutritional super food. Wanna incorporate this super ingredient into your kitchen endeavors? Here’s a few ways to get you started:
Add blended cottage cheese to your morning scrambled eggs – makes then light and fluffy.
Instead of heavy cream for soups and sauces, try stirring in blended cottage cheese!
Do as my mom did when making lasagna – ditch the ricotta and yup, you guessed it use cottage cheese!
Sticking with the Italian theme, Alfredo sauce with blended cottage cheese is a great sub.
Dips, muffins, cream-based casseroles and even desserts such as cheesecake are all great recipes to give cottage cheese a try. See what you can come up with!

No Buttermilk, No Problem
Buttermilk – it’s one of those ingredients that you don’t always have in your fridge but when you need it you need it! But fret not – no need to make a grocery run. While you cannot substitute regular milk instead, because it doesn’t have the same properties, there are a number of buttermilk substitutes you can create with just a few simple ingredients that you probably already have in your refrigerator. Here’s a few of my favorites!
Mix 1 cup milk with 1 tablespoon lemon juice. Let it sit until it curdles ~five minutes.
Mix 1 cup milk with 1 tablespoon white vinegar. Let it sit until it curdles ~ five minutes.
Mix 1 cup milk with ½ tablespoon cream of tartar. Let it sit until it curdles ~ five minutes.
Whisk ¾ cup plain yogurt with ¼ cup milk. Let it sit until it curdles ~ five minutes.
Mix ⅔ cup milk with ⅓ cup sour cream. Let it sit until it curdles ~ five minutes.


